Protection You Can’t See, A Look You Can Love: The Appeal of Stealth PPF, And Our Process.
"When your car is clean, you feel better. When you feel better, you have more opportunities."
- Larry Kosilla
Why This Owner Chose Stealth PPF, and Why You Should Too.
We've all seen the matte vinyl wraps on the streets these days; they're a dime a dozen. The "matte look" was really cool when it first came out, but then everyone started putting it on their cars. It just looked wrong on certain cars.
Especially when people applied cheap and weird coloured vinyl to their cars, it ruined the look and made the car feel "fake". Did you ever see a car like that, and it made you feel a little weird inside? Thinking, it's not supposed to be like that.
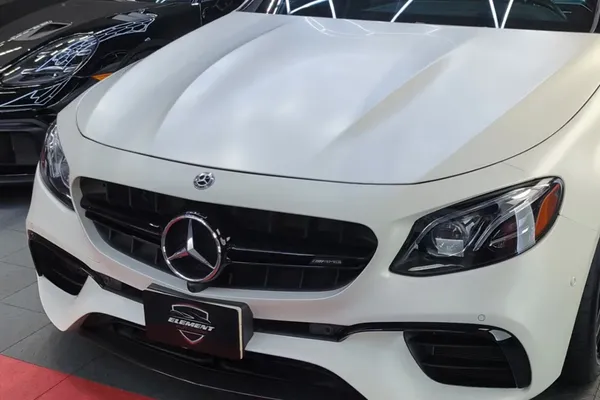
The owner of this Mercedes E63 definitely didn't want that cheap look, or a different colour with a matte vinyl. While he loves the colour of his car, he also wanted a new look and feel. That's why he chose the superior protection of Stealth PPF (a satin finish Paint Protection Film).
PPF is significantly thicker than vinyl (6-10mm vs 2-4mm). PPF offers protection from rock chips, UV rays, bug splatter, scratches, and highway debris. While vinyl easily gets damaged from the sun, and the smallest rocks can chip the vinyl and your car.
With a Stealth PPF, you get a completely new look to your car that isn't cheap, with all the protections of PPF.

With that said, here is our process for applying PPF at our shop.
1. Workshop Setup
It's essential to have a clean and controlled space when you apply PPF. Even the smallest amount of dust or dirt can affect adhesion and clarity of the film. These are the steps we take:
Remove anything that doesn't need to be in the room.
Mop the whole floor.
Wipe down all surfaces in the working area.
Turn off all fans inside to reduce airflow, because we don't want potential dust blowing around. (We only leave a couple fans blowing air out of the shop to create a negative pressure in the room)
Layout all the tools we'll need for the install.
2. Detailed Surface Prep: Deep Wash & Decontamination
Now it's time to get the car ready. We want to make sure the car surface is clean and free of any contaminants that might interfere with the film's adhesion.
Here we run a full-detail style wash, making sure to spend extra time with the pressure washer on all the edges and crevices where dirt might be hiding. This part is usually pretty fun, blasting away all the loose dirt that's hiding behind the trim and the trunk channels. (Detailers will know what's up!)
We want to spend extra time here getting rid of dirt and debris because we don't want any of that falling out as we're installing the PPF.
We use a plush [Gyeon microfibre mitt] for our wash. These synthetic wash mitts are made of 3 different types of fibres and have a GSM (grams per square meter) of 1250, which is exceptionally high for a wash mitt.
This means they have a higher concentration of fibres, making them extremely soft, plush, and highly absorbent, which helps to lift dirt away from the surface and reduce the chance of scratching delicate finishes.
After a deep pressure wash and bath, we give the car surface a detailed clay bar. This will remove embedded contaminants like brake dust, industrial fallout, tree sap, rail dust, and tar from the paint surface. Clay barring the car will ensure the surface is smooth, and nothing is buried in the paint for better PPF adhesion.
If there are deep scratches, swirl marks, or water spots, polishing would be our next step. We want to remove anything that can be visible under the film, we want the surface to look as flawless as possible after the install.
We will do a final wipe down with isopropyl alcohol once all the necessary parts are removed, the film is prepped, and right before we're ready to apply.
3. Disassembly: Removing Emblems, Trim, and Handles
Once the surface is clean and imperfections removed, we take off all the emblems, badges, lights, trim, and handles around the areas where PPF is going.
This is important because we don't want a place for dirt to hide, and it makes sure the edges will be hidden (once everything is reinstalled) for a clean install with fewer cut lines.
Pro tip: If we ever get stuck and don't know how to remove a part, we turn to The University for All Things: YouTube. 😉
This can also prevent lifting later on, as edges installed under the trim have better adhesion because there is less chance of water and debris getting under it.
Depending on the car, we don't always remove every single thing like this E63. It just depends on the car and what will look the cleanest.
4. Film Preparation: Cutting / Patterning
Next, we move into laying out the patterns to be cut out on our software.
Our program has most makes and models already preset, so we can select the car we're working on (making sure to select the right trim), and all the pieces we need will be available.
There are occasions when the vehicle we're working on doesn't have a preset in our program.
In this case, we have to take a big enough piece to cover the one panel, and then bulk it.
Which means we custom-cut it by hand to fit each panel.
When the vehicle is available in our software, we can go ahead and lay out each preset piece in the program to maximize the space we have available on the film.
We want to waste as little film as possible, as rolls can be expensive.
This means playing Tetris with all the pieces.
Once all the pieces are laid out to minimize waste, we can send them to the plotter to be cut out.
5. Solution and Tools Prep: Slip Solution vs Tack Solution, Rubber VS Silicone Squeegees
We're just about ready to start the install now, just need to prepare the solutions we're going to be using.
First, we got the slip solution, which is for sliding the film around to get it in place. We also like to use this solution with a squeegee to wipe off any dust right before laying down the film.
Our slip solution is made of water and a small amount of mild baby soap.
Next, we mix our tack solution. This is mainly made of a small amount of isopropyl alcohol and water. This is for final placement when the film is lined up properly. The isopropyl alcohol in the solution helps remove the soapy water so the film sticks. We generally use this along the edges of the film, but sometimes it's necessary to apply the tack solution to most of the panel.
Once we have all our solutions mixed up, we lay out all the tools that we need for the job onto a table. This includes our razor blades, solution spray bottles, knife, and squeegees, mainly. We use a mix of both silicone and rubber squeegees because they both have a purpose, depending on the panel and the edges that we're applying to.
6. Installation: Film Application & Squeegee Technique
Now that everything is laid out, we can lay out the film that's been cut from the plotter. We like to remove the excess film from the sheet first, and then we'll cut out the smaller pieces so they're easier to move around, instead of lugging the whole sheet around. This step isn't necessary, but we like to do it this way.
The fun part finally begins, and we can start applying the film. Here are our steps:
We spray the panel with the slip solution and squeegee off any dust that might have settled.
We peel the film from the sheet. Spraying slip as we go to keep dust off and to keep it wet.
Next, we spray the panel we are applying to and soak it with the slip solution. All this solution is so we can move the film around because we're not going to get it perfect right off the bat.
Now apply the film onto the panel with the slip solution and position it the best you can. Here, we will move it around until we get it to where we want it.
A lot of times, we won't get it in the best position the first time, or we may want to adjust one side of it or stretch the film so it reaches the edge better. So we oftentimes have to remove the film partially or completely, so we can spray more slip solution, to adjust it further.
Assuming we have it exactly where we want it now and all the edges are lined up perfectly (or the best we can get it), we will squeegee a few of the edges so the film remains in place where we want it. And we will add the tack solution on the edges as well if needed, to hold it in place better.
Now that it's where we want it, we use the squeegee to push all of the slip solution out, always starting from the top and pushing the water down and out. Work your way from the middle top, down and out wherever possible. (This isn't always possible.)
Take your time here, you want to get all of the solution and air bubbles out for the cleanest install, and best adhesion possible.Once all of the solution is pushed out, we will wait for the rest of the solution on the edges to dry off, because you can't squeegee it any further. This is where tack can come in handy, along the edges. It will help the solution evaporate faster.
Now we can attempt to close the edges once it's dry. If the pieces were cut out properly and the size was good, and the application was good, then you can generally use your fingers to just wrap the rest around the edge of the panel. If there's excess film, you may need to cut it off with a razor/knife before you close the edge.
Lastly, with the heat gun, we will make sure the edges seal tightly. We will run the heat gun along the edges to make sure it adheres and wraps well on the edges.
We repeat these steps for the whole car or whichever part of the car needs to be wrapped.
After the whole car has been wrapped, we check to make sure all the edges are closed and sealed properly. We also double-checked for bubbles, dust, or any other imperfections that we may see.
7. Addressing Difficult vs Easy Areas (High-Complexity Panels)
Now those are the steps we use to apply PPF. It sounds simple in the steps, but in reality, it's way more difficult in certain areas. Hoods and doors are generally some of the easy parts, but it really depends on the car. Cars with lots of complex geometry or lots of tight curves are much harder to install film on and require more skill and experience.
For example, the whole car of a Tesla Cybertruck is way easier to do than a Porsche is. As you can imagine, the Cybertruck's panels are all flat, and the Porsche is all curves. Then you get into some of the supercars, which have all kinds of unique curves, deep recesses, and unique shapes.
When it comes to Stealth PPF, specifically, this film may be less forgiving, and this kind of finish may show imperfections more than gloss films do.
The type of car also plays into our decision to remove handles and trim, etc or not. We want the cleanest look possible for all cars, and some cars allow this without needing to remove so many things.
8. Reassembly: Putting Back All Parts & Final Inspection
After we've spent hours or days applying film to the car, squeegeeing, closing edges, overstretched film, many headaches, thrown tools, and pulling hair, we can now think about putting the car back together. All jokes aside, it's not always this frustrating. It's usually a good time, but boyyyyy, on some days it can be.
Reassembling the car is pretty simple. We just go in reverse of everything that we removed when we removed the emblems. If we kept all the parts and screws organized when we removed them, then this should go pretty quick and smoothly.
Once all the trim and parts are put back into place, we can do the final inspection. This is where we double-check for any small bubbles with air or water stuck in it, any alignment issues, and that the edges are tight. This is our last chance to correct any errors or substandard areas.
9. Ceramic Coating (If Opted for by Client)
We always suggest that the clients get a PPF Ceramic Coating done on the brand new PPF film, because it's just another layer of protection for their new investment. The film provides serious protection for your paint, but why not protect the film also?
A ceramic coating for your PPF film will:
adds a hydrophobic layer
adds some gloss
makes cleaning easier
resists bug guts
protects againts bird droppings
enhances UV protection
preserves the PPF's integerity
Ultimately, protecting your car's value by protecting the film itself.
9. Aftercare & Maintenance Instructions
Now, some notes to our clients regarding the care and maintenance of the film.
We suggest waiting a week before washing your car.
We always suggest using Gyeon products for your car care because they are the most effective and gentle for your new PPF film. If you choose to use other products, choose a pH-neutral soap.
Use a soft, plush microfiber mitt. (Gyeon has the most plush mitts we've seen on the market)
Avoid any kind of brush and harsh scrubbing.
Avoid harsh chemicals.
Avoid heavy polishing.
Do not use a pressure washer too close to the edges to avoid lifting.
Remove bird droppings, bug splatter, tar, sap, and the like as soon as you can. These can degrade the film if left too long.
FAQs / Common Mistakes & How to Avoid Them
Q: Why does dust or debris under the film ruin the result (even if tiny)?
A: Even a very small amount of dust can cause issues with adhesion. Dust particles may also be visible on certain paints, causing the film to look like it has tiny air bubbles.
Q: Why does cleaning the car have to be thorough, and you can't skip the clay-bar and alcohol wipe?
A: Similar to dust, any contaminants left behind will cause adhesion issues and bubbling. The cleaner the surface is of dust, dirt, oil, bugs, and grime, the better the adhesion will be.
Q: Why does improper washing after install ruin the film?
A: Using abrasive cleaning materials, excessive scrubbing, high-pressure water, harsh chemicals, acidic solutions, and the like, can compromise the integrity of the film.
Q: What can I do if the film lifts or bubbles later?
A: We highly suggest you bring it back to us to fix. We don't want you to try to fix it on your own, and then possibly causing more issues. Even if you know what you're doing, we want to be responsible for our work.
Why Stealth PPF Was Worth It
This Mercedes E63 is now protected from the sun, bags, rock chips, road grime, and careless people walking by for the long term.
Not to mention the ease of cleaning the car, the protection of the long-term value, and the stealth look of it.
Needless to say, this owner was extremely happy with their PPF installation.
Don't hesitate to reach out to us if you have any questions about PPF for your own ride.
Element Auto Spa
📞 +1 778-712-0459
✉️ 11880 Hammersmith Wy Unit 115
Richmond, BC V7A 5C8
